.png)

Check Wi-Fi, Airplane Mode, and connection status first, then use Windows 11’s built-in Network and Internet troubleshooting tools for common problems.
If connectivity issues continue, reconnect to the network, restart the modem and router, and update or reinstall the wireless adapter driver.
Advanced fixes include resetting network commands, disabling wireless power saving, reviewing DNS and proxy settings, and using Network Reset last.
A stable internet connection is one of the most basic requirements of everyday computing life. Every routine task, from a work video call to a simple web search or an online payment, depends on a wireless signal that stays active without interruption. When that signal breaks down, even for a few minutes, it can disturb an entire workday or an important conversation. Windows 11 users sometimes notice sudden drops in connection, unusually slow speeds, or a complete loss of network access without any clear warning.
This article explains the most reliable methods, drawn from official Microsoft documentation and other trusted technical sources, to identify and resolve Wi-Fi problems in Windows 11 in a structured and practical manner.
Also Read: How to Reset a Windows 11 PIN: Step-by-Step Guide
Before attempting any technical fix, it is worth confirming the simplest settings first, since a large number of connection complaints trace back to something overlooked rather than a genuine fault. Select the network icon on the taskbar and check whether Wi-Fi is switched on at all. Open Settings, go to Network & Internet, and confirm that Airplane Mode is turned off, since this single toggle disables every wireless radio on the device, including Wi-Fi and Bluetooth. Check whether the connected network shows the status ‘Connected’ under its name, rather than a vague label such as ‘Limited’ or ‘Identifying.’
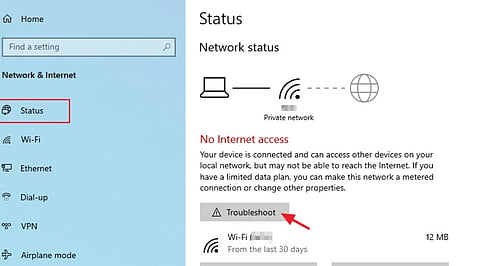
Windows 11 includes an automated Network and Internet troubleshooter built into the Get Help app, designed specifically to save time for users who are not comfortable with manual fixes. This tool runs a short diagnostic scan across the wireless adapter, IP configuration, and related services, and attempts to correct common problems on its own. It is recommended as a first step for most users, since it requires no technical knowledge and takes only a few minutes to complete.
A saved network profile inside Windows can sometimes become corrupted, particularly after a router replacement, a password change, or a firmware update on the router itself. To fix this, open Settings, select Network & Internet, then choose Wi-Fi, and click on Manage Known Networks. From the list, select the network causing trouble and click the Forget option next to it.
Once the old profile is removed completely, reconnect to that same network by selecting it again from the list of available networks and entering the password carefully, since even a small mismatch will bring back the same failure.
A large share of Wi-Fi issues actually originate outside the computer altogether, inside the home networking hardware rather than within Windows itself. To rule this out, unplug both the router and the modem from their power source, wait for around thirty seconds so that any temporary memory is fully cleared, and then plug the modem back in first, allowing its status lights to stabilise completely before continuing. Only after the modem is fully powered on should the router be plugged back in and given a few minutes to complete its own startup sequence.
An outdated, missing, or damaged wireless driver is one of the most frequent causes of dropped connections, and this becomes especially noticeable right after a recent Windows update changes underlying system files. For this, open Device Manager, expand the Network Adapters section, right-click on the wireless adapter listed there, and select Uninstall Device, making sure to tick the additional option that removes the driver software along with the device entry itself. After restarting the computer, Windows will automatically detect the missing adapter and reinstall a fresh driver on its own.
Windows continuously stores network configuration data in the background, and this data can occasionally become inconsistent, leading to strange connectivity behaviour that basic settings cannot explain. Opening Command Prompt with administrator rights allows a set of built-in commands to reset this stored data cleanly, and each command handles a different part of the network stack. For an easier reference, the table below lists each command in the order it should be typed, along with a short explanation of what it actually does.
A restart after typing these commands allows every change to take full effect together, rather than applying only partially while the system is still running.
Windows often reduces power delivery to the wireless adapter automatically in order to extend battery life on laptops, and while this feature is helpful for battery health, it can also cause random and frustrating disconnections during normal use. To adjust this, open Device Manager, locate the wireless adapter, open its Properties window, and select the tab labelled Power Management. Inside that tab, uncheck the box that reads ‘Allow the computer to turn off this device to save power,’ then click OK to save the change.
Also Read: How Windows 11 Task Manager is Evolving to Monitor AI Workloads
An incorrect DNS setting or an active proxy configuration can allow a device to stay technically connected to Wi-Fi while still failing completely to load any website in the browser. To fix this, open Settings, go to the Wi-Fi network's hardware properties, and switch DNS server assignment from Automatic to Manual, then enter a trusted public DNS address such as 1.1.1.1 as the preferred server and 8.8.8.8 as the alternate one. Separately, it is worth checking Settings, then Network & Internet, then Proxy, to confirm that no manual proxy server is left switched on unintentionally.
Network reset should always be treated as a final option, applied only after every targeted fix explained above is already attempted without success. This tool removes every installed network adapter along with its individual settings, then automatically reinstalls each one fresh after the computer restarts. It is available by opening Settings, then Network & Internet, then Advanced Network Settings, and finally selecting Network Reset from that page.
Wi-Fi problems in Windows 11 rarely trace back to a single fixed cause, and the most effective approach is always to work through the available steps in order of simplicity, starting with basic settings and gradually moving toward driver updates, command-line resets, and hardware-level checks. When every Windows-side fix explained in this article is already attempted without success, the underlying fault is most likely sitting with the router itself, the internet service provider's network, or physical distance and interference between the device and the wireless access point, and attention should shift firmly in that direction.
Start by checking whether Wi-Fi is enabled and Airplane Mode is disabled. If the connection still fails, restart the router, forget and reconnect to the network, then update or reinstall the wireless adapter driver.
A Windows 11 device can show a Wi-Fi connection while internet access fails when DNS, proxy, router, or IP configuration faces a problem. Check proxy settings, flush DNS, Network & Internet, Advanced Network Settings. Disable the adapter’s power-saving option, move closer to the router Wi-Fi fails after a Windows update, check Device Manager for the wireless adapter and consider reinstalling its driver.
How do I reset Wi-Fi settings in Windows 11?
Windows 11 provides a Network Reset option under Settings, Network & Internet, Advanced Network Settings. It removes installed network adapters and their settings, then reinstalls them after restarting the computer.
Frequent disconnections can result from wireless adapter power management, weak signal strength, driver problems, or router issues. Disable the adapter’s power-saving option, move closer to the router, and check for an updated driver.
If Wi-Fi fails after a Windows update, check Device Manager for the wireless adapter and consider reinstalling its driver. If Windows cannot restore the driver automatically, obtain the latest compatible version from the device manufacturer’s official support page.
